Tag Archives: paste paper

DIY Decorative Gift Container

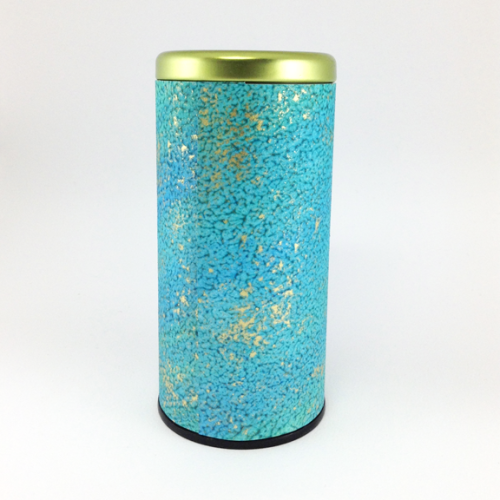
What started out as a tin for my tea has been transformed into this beautiful decorative gift container.

What started out as a tin for my tea has been transformed into this beautiful decorative gift container.

It’s easy to make your own decorative gift container. All that is necessary is a container, some decorative paper, double sided tape and a craft knife or scissors. Just follow the do-it-yourself instructions below.
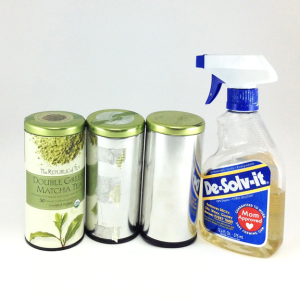
From left to right: the tin my tea comes in. the tin with the paper torn off (sticky stuff still showing), tin cleaned, De-Solve-It which really takes the sticky off my tin.

From left to right: original tea tin. tea tin with paper torn off with sticky residue remaining, tea tin cleaned, De-Solv-it which takes off the sticky residue.

I love to use cylindrical containers like the ones that tea or hot chocolate or oatmeal comes in. My favorite is the metal tins in the photo on the left that contains Double Green Matcha Tea from The Republic of Tea.

First I empty the contents from my container and clean it as best I can. For my example I have used my tea tin. I first remove the paper label. There is usually an awful sticky residue and some paper left behind. To clean this I use De-Solv-it which is organic, biodegradable, environmentally friendly and works like a champ to remove all sorts of sticky stuff.
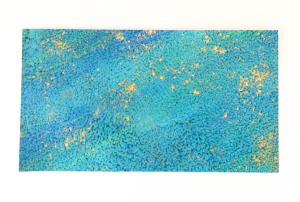
Paper cut to the height of the can and enough to overlap about an inch.

Paste paper is cut to the height of the can and enough to overlap about an inch going around the can.

Once my tin is ready, I measure the height of the tin. I cut a piece of decorative paper the height of the tin and about an inch longer than its circumference. I have found that using a fairly light weight paper works best. In this example I am using a piece of paste paper that I made. For information on how I make my paste papers, see my posts Making Paste Paper: Part 1 and Making Paste Paper: Part 2.

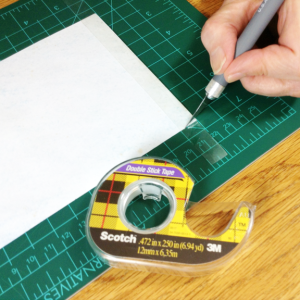
Here I am trimming the double sided tape to the height of the paper.

Here I am trimming the double sided tape to the height of the paper.

Now I attach a strip of double sided tape to each of the ends of the paper. Be sure to apply the tape to the wrong side of the paper. I put the tape as close to the end of the paper as possible and overlap the tape on top and bottom on to a cutting surface. Then  I cut the tape as close to the height of the paper as possible without cutting the paper. See the photo on the left. The double sided tape is just one I picked up at a local stationary store. You don’t need a special type of artists tape.

The photo above shows one side of my paste paper has been attached to the can.

The photo above shows one side of my paste paper has been attached to the can.

Now I attach one side of the paper to the tin. I carefully line up the paper on the can and press to attach the paper to the tin. I roll the tin slowly while making sure the paper fits properly. If I am off, I unroll the tin and carefully reposition the paper and start rolling again. When I come to the end of the paper it should overlap a little and I push to attach the end of the paper. Now all I need to do is to add a gift.
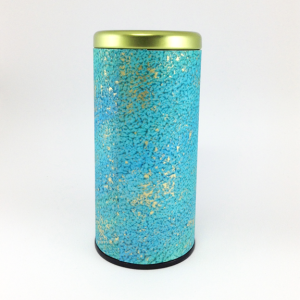
My finished gift container.

My finished gift container. Note that the seam is facing you in this photo. It’s hardly noticeable at all.

See, it’s easy. I love finding ways to re-use things that would normally end up in either the trash or recycle bin. Once I give a gift in this container, I am sure my container will get used over and over again.

Enjoy, Candy

Courage Inspiration Book

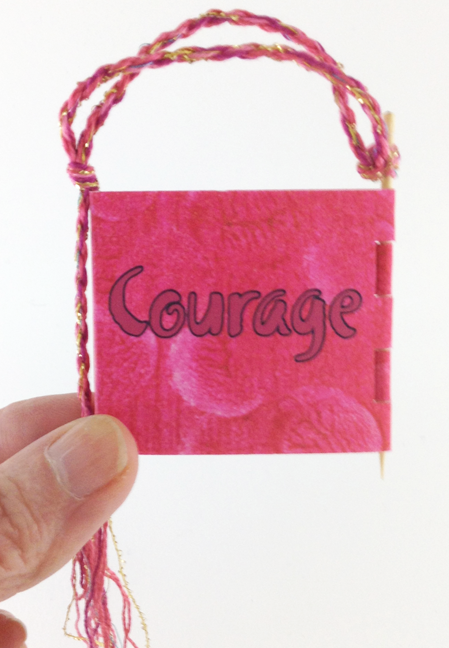
Accordion Courage Inspiration Book closed

Accordion Courage Inspiration Book closed

This tiny accordion Courage Inspiration Book was a custom order from an artist friend. It is going to be a gift to an amazing woman who is going through chemotherapy. My friend supplied the quote and I made this tiny accordion book for her.

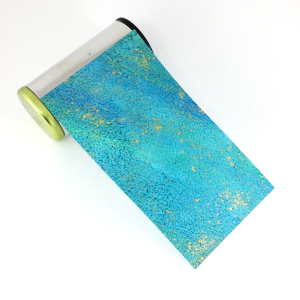
The cover of the book is a scanned image of one of my paste papers. We decided that courage was red/maroon. I picked this paste paper design for the cover. The circular impressions were actually made by pressing a cork into the wet colored paste.

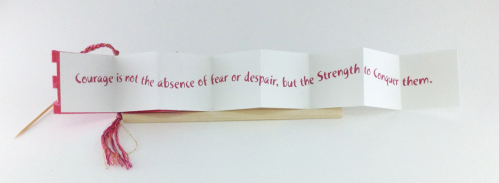
Accordion Courage Inspiration Book open

Accordion Courage Inspiration Book open. It says, “Courage is not the absence of fear or despair, but the Strength to Conquer them.”

The little book is closed with a toothpick inserted into a piano hinge. I made the twisted cord to match the colors of the cover of the book. The text inside was done in Adobe Illustrator and printed on my archival printer.

Hugs and courage to all, Candy

Making Paste Papers: Part Two

Paste papers drying

If you haven’t read part one yet, you can find it here Making Paste Papers: Part One.

Once I’m happy with the way my paste paper looks, it’s time to let it dry. I transfer it to another nonporous surface (and clean up the one on which I made the paste paper). To save space, I set up a drying rack in the bathroom to hold the paste papers on their drying boards (see above photo). Why the bathroom? Because the bathroom floor is linoleum. Cleaning colored paste off a carpet is not easy, just take my word for it!

While the papers are drying, I have to regularly lift up each paste paper to make sure it doesn’t adhere to its drying board. Failure to do this results in a ruined paste paper, which is just one more reason why I prefer making them in the summer. The drying time, as well as the constant checking and lifting of each paste paper, is a lot shorter than at any other time of year.

If you’ve ever had to dry out a piece of paper, you know that it warps as it dries. Paste papers are no different; once dry they need to be ironed flat. I like to iron them on a wooden board, with a piece of an old sheet on both sides of the paste paper. This protects both my iron and the board from getting color or paste on them, just in case. I use a dry iron, and I iron both sides of the paper.

Two books I made which have paste paper covers.

Now, I’m finally ready to make art with my paste papers. I originally made paste papers for bookbinding, either as end sheets or as covers for books. Now I use them for all kinds of paper crafts, and I keep finding more!

Three boxes made out of paste paper.

If you are interested in learning more about paste papers, my favorite book on the subject is The Art of Making Paste Papers by Diane Maurer-Mathison. It’s currently out of print, but you can find it on Amazon for around $40 used. That’s pretty expensive for a paperback, but it’s the best book on making paste papers that I’ve ever come across.

Enjoy, Candy

Making Paste Papers: Part One

It’s Summer, which means I get to pull out my paints, cook up some archival paste, and play for days making paste papers. I only make paste papers during the summertime, because they dry so much quicker. Since I have a limited amount of space in which to work, the faster they dry, the more I can make.

This is what I use to make my paste.

I usually work with two paste recipes. The first is simply methyl cellulose and distilled water, which I use when adding gold and silver highlights. I get powdered methyl cellulose from www.danielsmith.com. Getting it to the right consistency takes about two days and lots of stirring. Once made, this paste can be used for months. The second recipe consists of wheat starch, rice flour, glycerin, tincture of green soap, and distilled water. This requires cooking, cooling, and running the paste through a sieve to remove any lumps. Even when refrigerated, this paste only has a shelf life of a week or less.

Here I am painting yellow paste on wet paper.

Once the paste is ready, I put it into small containers and add acrylic paint until I get the intensity of color that I want. I generally use Golden Acrylic paints because they’re highly pigmented; ‘a little dab’ll do ya’.

Here I have added more colors of paste and am blending them together on the paper.

If you’re working with children, and you want a simple, kid friendly recipe, you can make the paste from flour and water and use tempera paints to color the paste.

Before painting with the colored pastes, the paper needs to be wet. I have a shallow plastic storage container partially filled with water in which I can dip my paper. Now the real fun begins. After putting the wet paper on a non-porous surface and smoothing out any bubbles, I apply the colored pastes, usually with a large brush. Then I make marks, patterns, and textures in the paste with all sorts of objects. I’ve used combs, bottle caps, brushes, rubber stamps, chopsticks, various found objects, and anything else that happened to be around at the time. I also sprinkle metallic powders on some of the paste papers.

Now I am adding texture by stamping a bottle cap into the wet paste.

My favorite paper to use for this is Mohawk Superfine, which I use in a variety of weights, from text weight all the way to cover stock. It all depends on what I plan to make out of the finished paste paper. For my non-porous surface, I use glass, plexiglass, or a piece of laminate.The first day I make paste papers usually feels like a warm-up. By the second day, however, I find myself making some absolutely fantastic paste papers. Since I only do this once a year, I try to make sure the color combinations I use cover all four seasons. It feels weird to be making a ‘Winter’ paste paper on a hot summer day, wearing a tank top and shorts.

Paste paper laid flat to dry.

We’re not done yet! In Part 2, I’ll tell you what comes next, and I’ll show you some of the new paste papers I’ve made this summer.

Enjoy, Candy

P.S. Click here to view Making Paste Papers: Part Two.

Mother’s Day Accordion Book

Mother's Day accordion book closed

Mother’s Day is just around the corner, April 13 to be exact. So here is a unique and beautiful way to tell your mother she is very special to you. This accordion book is a variation of the Happy Birthday accordion book of my last blog post.

The intense purple and gold paste paper I made for the cover of this accordion book makes a positive statement before the book is ever opened. The inside of the book is watercolor paper on which I have drawn the words Happy Mothers Day, then used watercolors and embellished them with a variety of gold and black pens.

Happy Mother's Day accordion book open

This book, like the Happy Birthday book my previous post, is about 2 3/8″ wide and 3″ tall. I make these little books with a variety of messages like Thank You!, Congratulations, I Love You!, Happy Birthday, Feel Better Soon and more. My customers constantly tell me that these little books are absolutely loved by their recipients.

This book, like the Happy Birthday book in the previous post, is about 2 3/8″ wide and 3″ tall. I make these little books with a variety of messages on the inside like Thank You!, Congratulations, I Love You!, Happy Anniversary, Feel Better Soon and more. My customers constantly tell me that these little books are absolutely loved by their recipients.

I like to tell friends and loved ones I care about them on a regular basis. I have lost a few over the years, and am ever grateful that I made it a point to tell them how they enriched my life while they were still alive. Having lost some very special people in my life is perhaps why memories are so very special to me and why I am drawn to making art that either creates new memories or commemorates old ones.

hugs to all, Candy

Happy Birthday Accordion Book

Accordion book closed

This is a fun little book I made last month. I started with a paste paper that I made last summer and covered davy board with it. I just loved the color of the paste paper and how happy it made me feel. The book ties closed with gold embroidery thread and beads to match the orange of the cover.

On the inside I hand drew the letters on watercolor paper. I used watercolors in colors to match the paste paper covers. Then I embellished the letters with a variety of gold and black pens. I just love how festive it turned out.

I just love the festive colors of the open book

This book is about 2 3/8″ wide and 3″ tall. I just love making tiny books, and I especially enjoy making ones that create memories. I am sure this little book will eventually go to someone very special, create a wonderful memory and make them smile each time they look at it.

Enjoy, Candy

50 Boxes For A 50th Wedding Anniversary

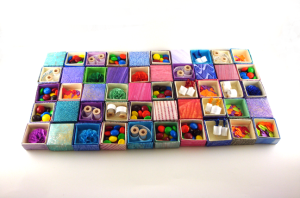
Here are the 50 boxes I made from my hand-made paste papers.


In late November I received a call from the daughter of some friends of mine. She told me her parents were celebrating their 50th Wedding Anniversary on New Years Eve and wanted to know if I would be interested in sending her a card for their anniversary and maybe including 50 of something in honor of their 50 years of marriage.  It was to be a surprise. I said sure and started thinking of what I would make.

This photo shows some of the boxes open.


Once I start thinking about making something, the idea of doing something simple seems to fly out the window, and this time was no exception. I decided that 50 tiny boxes made out of some of my hand-made paste papers would fit the bill. So between Christmas gifts, my mother’s birthday and setting up a Holiday Studio for Studio Artists at the Art Center, I made these 50 little boxes with a little help from my friend Paul.

50 boxes with some more of them open.

Once the boxes were made, they begged to be filled. These boxes are just a little over an inch square, so I had to think of what I could put in them. I had some tiny wooden spools that I had rescued from the trash that I made into little scrolls. I also made scrolls out of colorful cellophane topped toothpicks. Twelve M&M’s fit nicely into the boxes which allowed two of each color and was nice and colorful. Hearts seemed appropriate, so I cut out some in a number of colors. I also made some colorful paper flowers.

This shows all of the boxes open.

It was a fun project, the type I really love to do. I love making art that involves memories. That seems to be my specialty.

I loved the result and so did my friends.

Here are the 50 boxes all opened. The boxes are just a little over an inch square.